Better Slicing for 3D Printing
As you may know from previous posts, I was able to set up a rudimentary printing process with OctoPrint and my 3D printer. This relied on an old version of CuraEngine that was on the Raspberry Pi itself, but over time it became clear that that was not the most optimal way to 3D print. The next step was figuring out how improve my 3D model design and print flow to get clean, accurate prints.
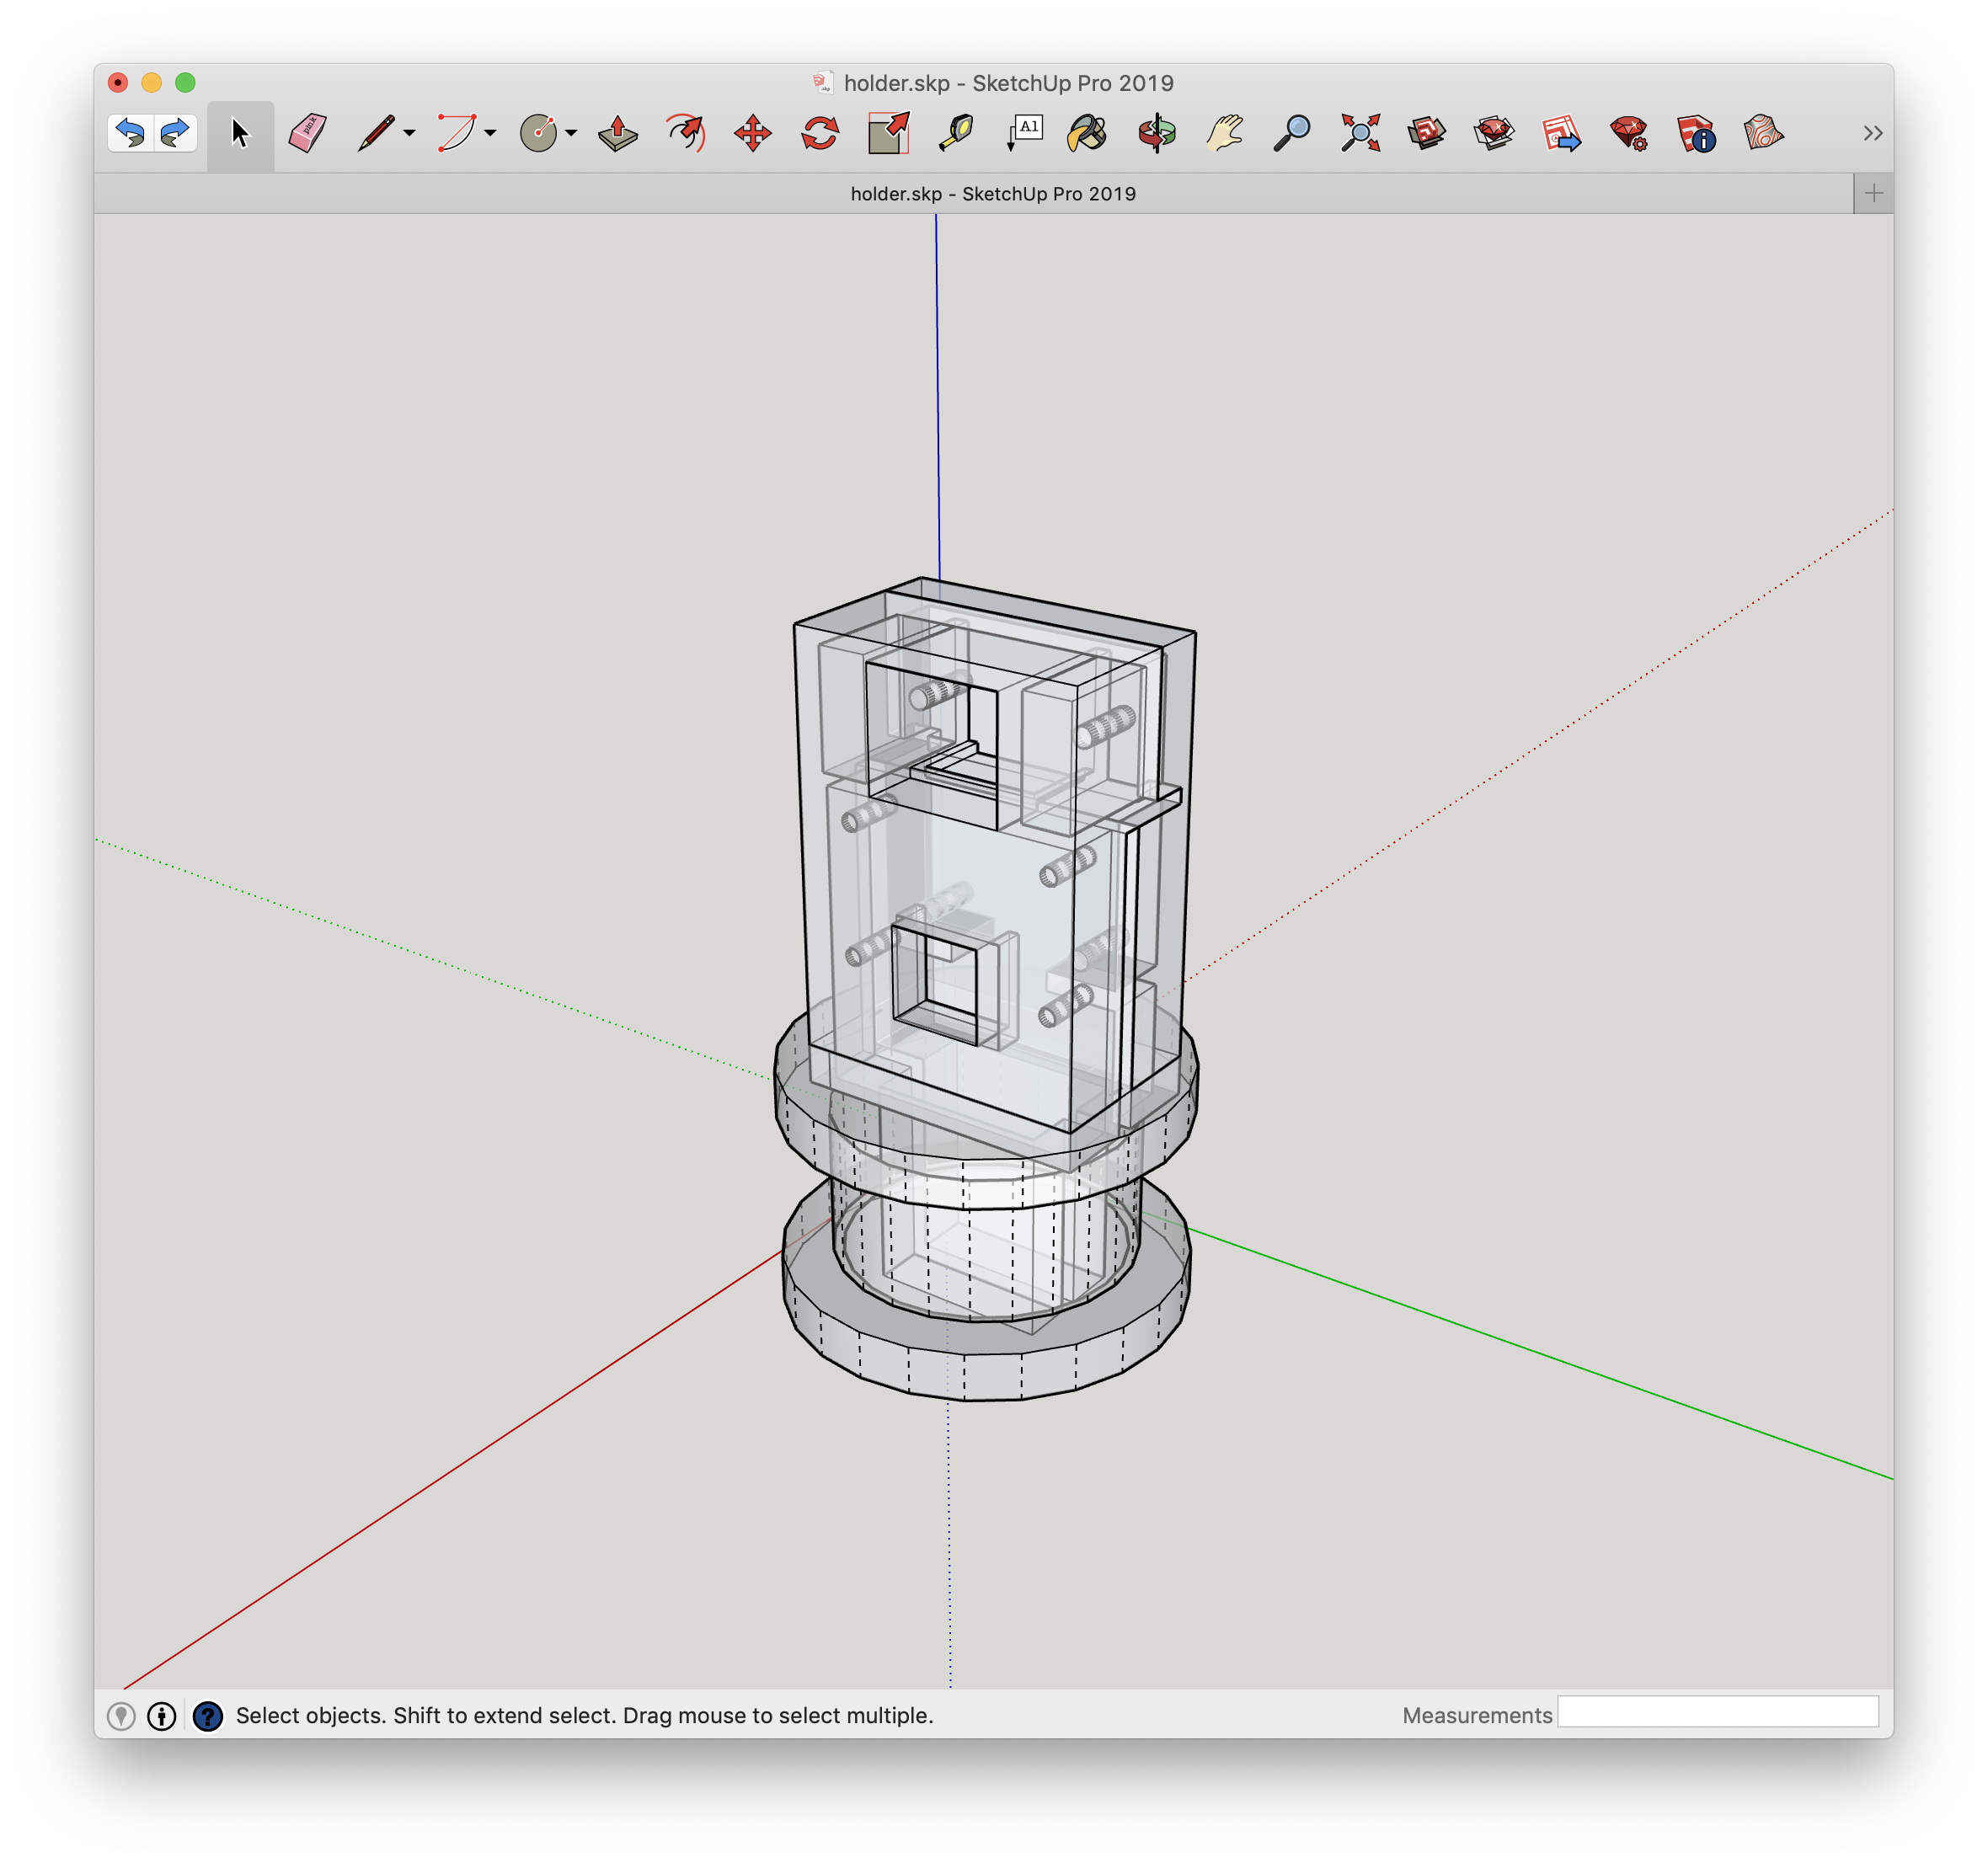
Some of you might be asking what I use to design 3D models for printing. Right now I use a piece of software called SketchUp to create very basic 3D models to print. As a beginner, I find that SketchUp has a reasonable learning curve, and has minimal controls so it’s not overwhelming in options. There are a few gotchas however; for instance, you must use a mouse with a middle button for it’s impossible to use with a touchpad; it’s not easy to custom set the dimensions of different shapes; and unless you have ruler snapping turned on, you’ll have a rough time getting everything arranged/oriented properly.
Once designed in SketchUp, I export the file to STL. Before this, I would upload this to OctoPrint directly and have OctoPrint slice it. Instead though, I could pre-slice on my on computer before uploading the STL.
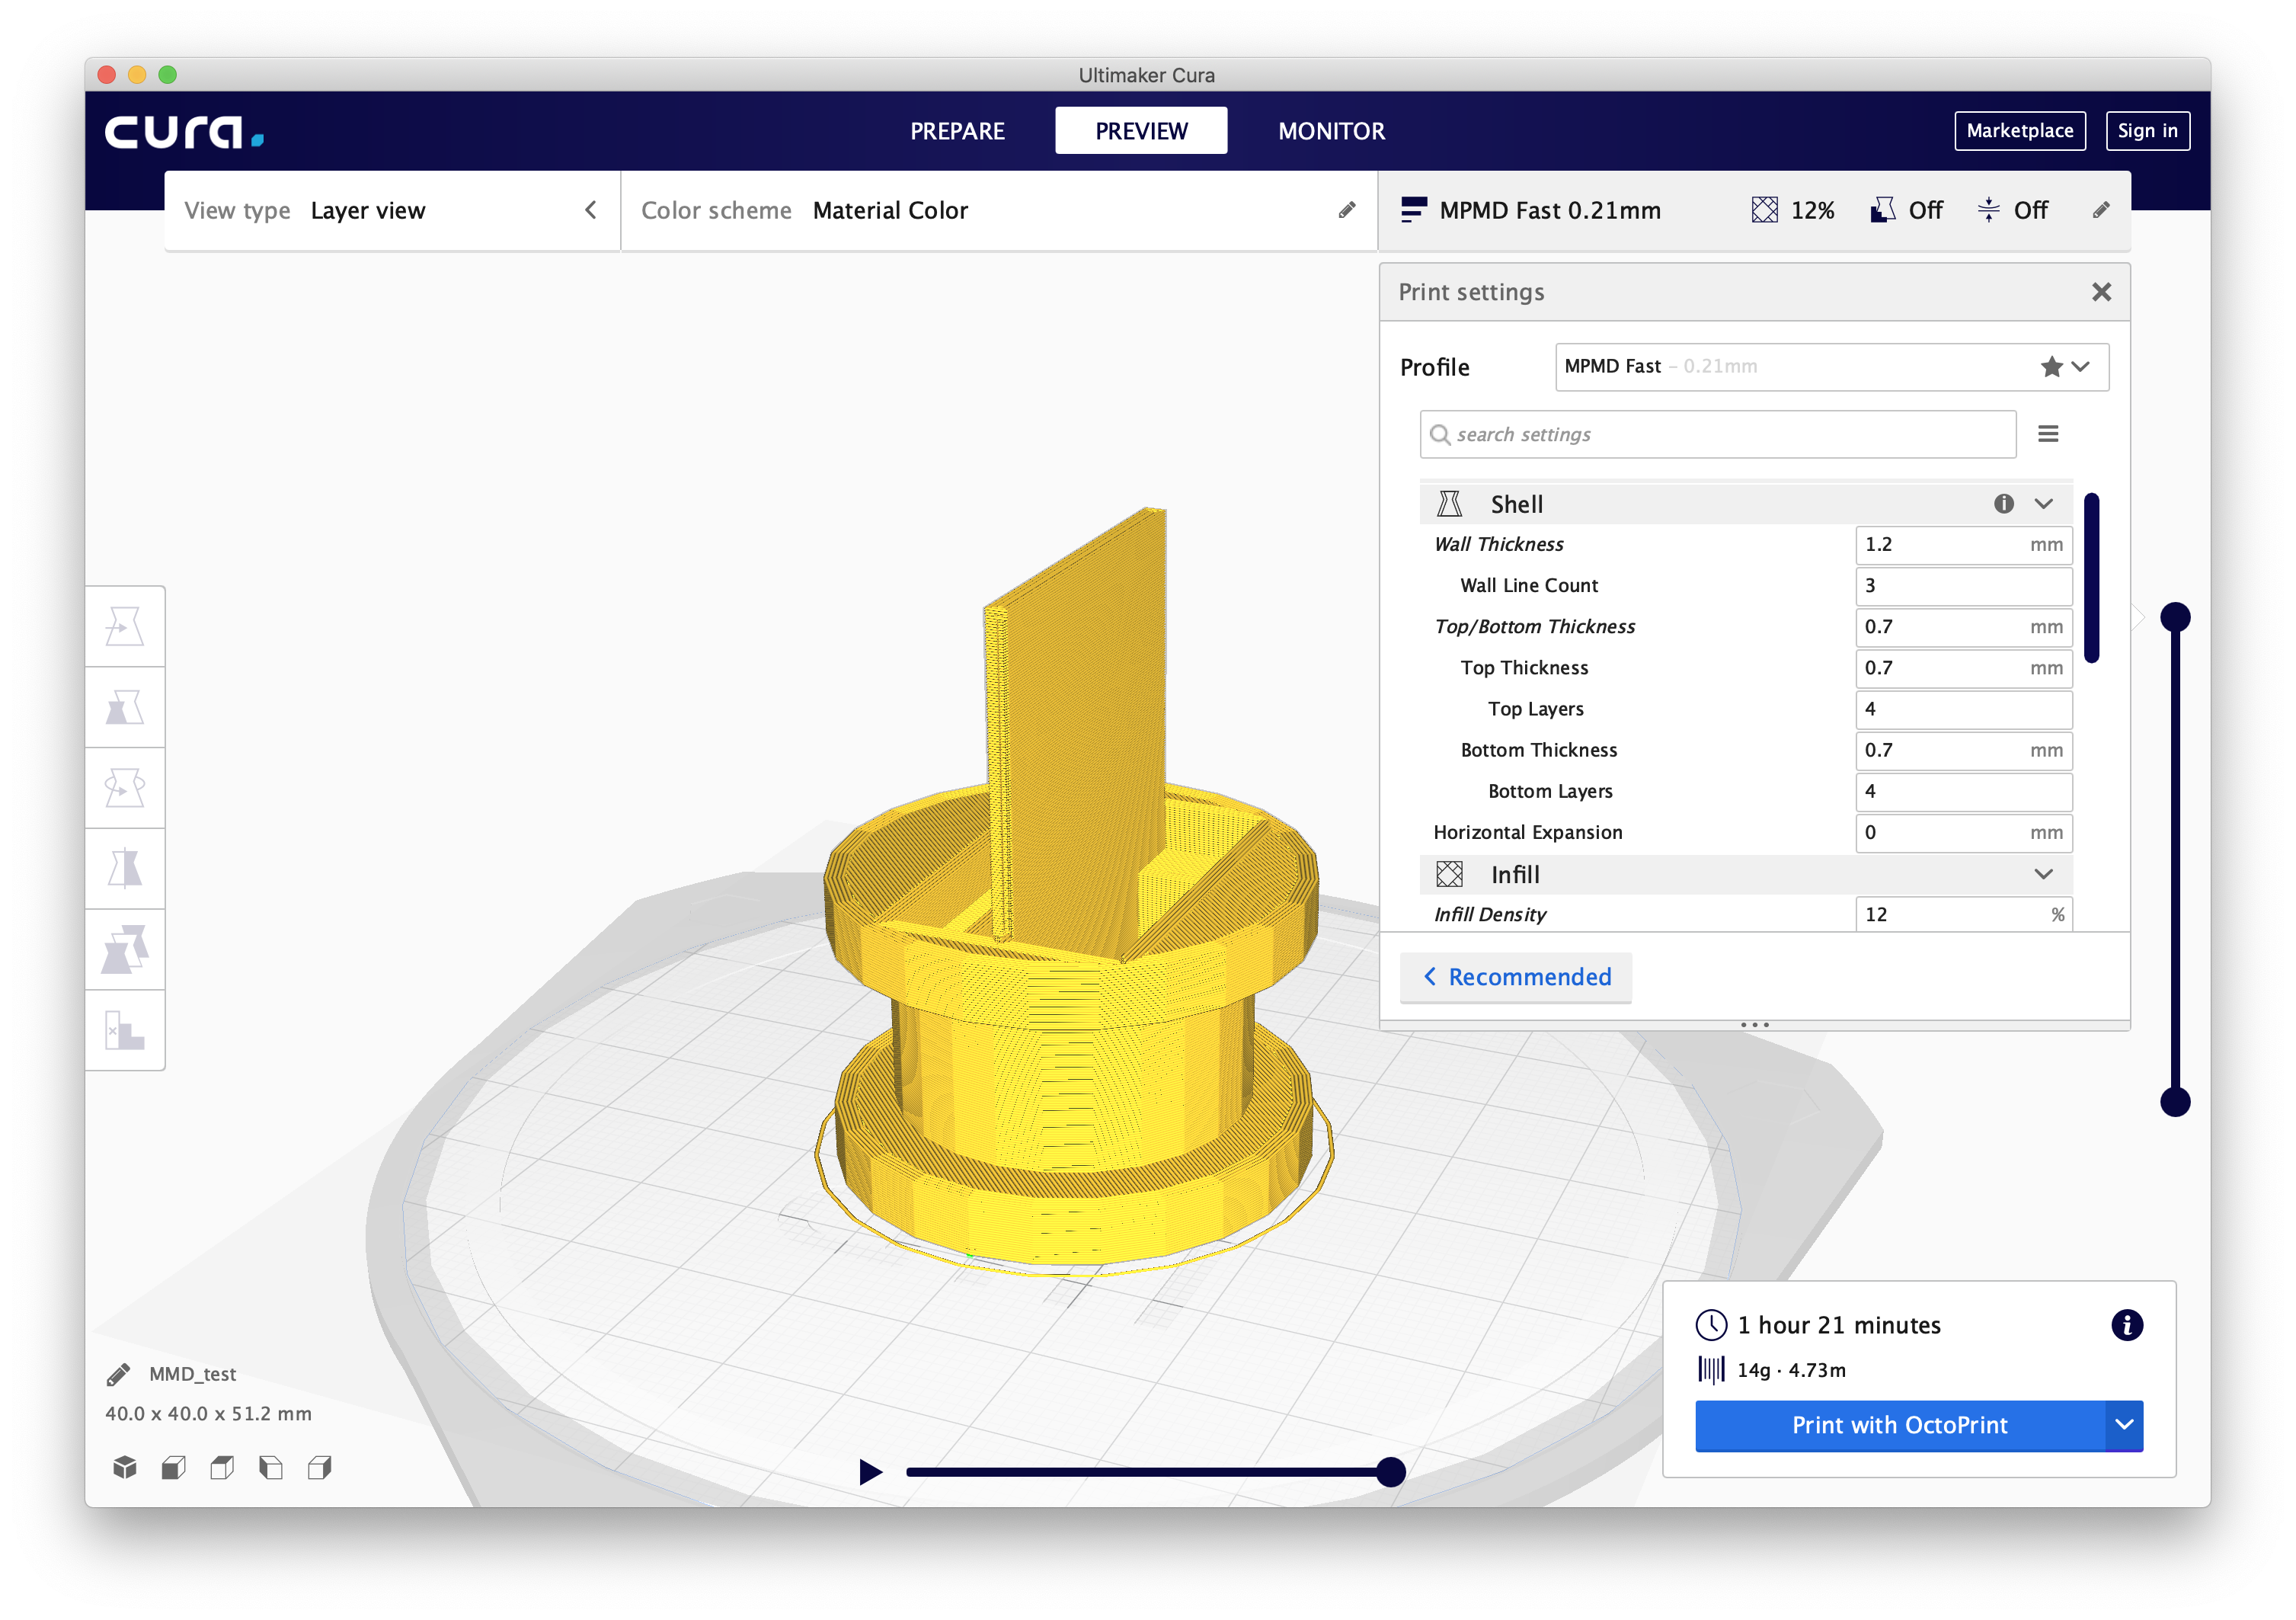
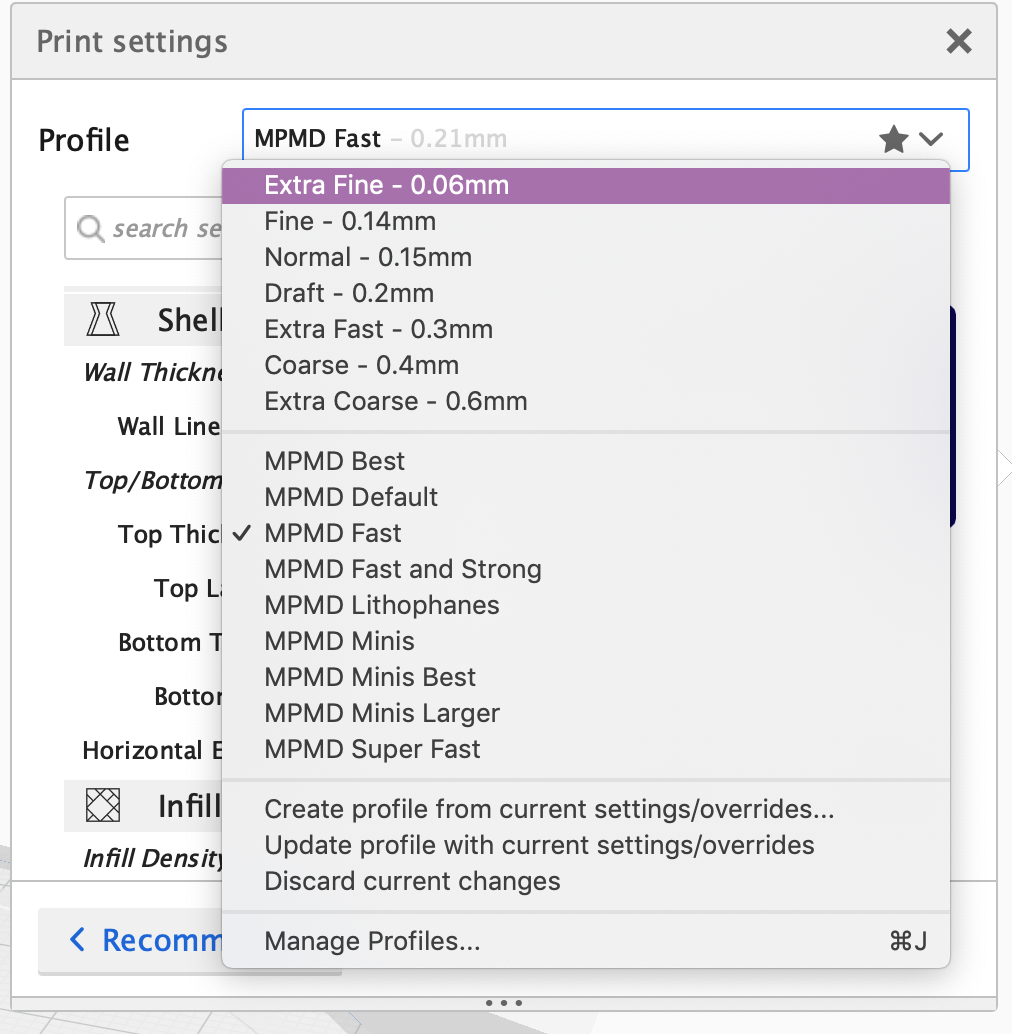
I installed Cura 4 from Ultimaker, to see how much it had improved from the super-old version on the pi. It turns out that Cura 4 does not have a profile available for my 3D printer out of the box. Thankfully, the maker community has kindly come up with different battle-tested profiles to install for Cura 4; I used this one by Brian Kurtz. The nice part about this is it bakes in the auto-calibrations for the printer. It turns out that the optimal thicknesses for printing for the delta are in multiples of 0.07mm, not the other multiples that are default in the software. Another useful setting I discovered was to enable the Z Hop When Retracted setting which prevented the nozzle head from colliding with the model during print.
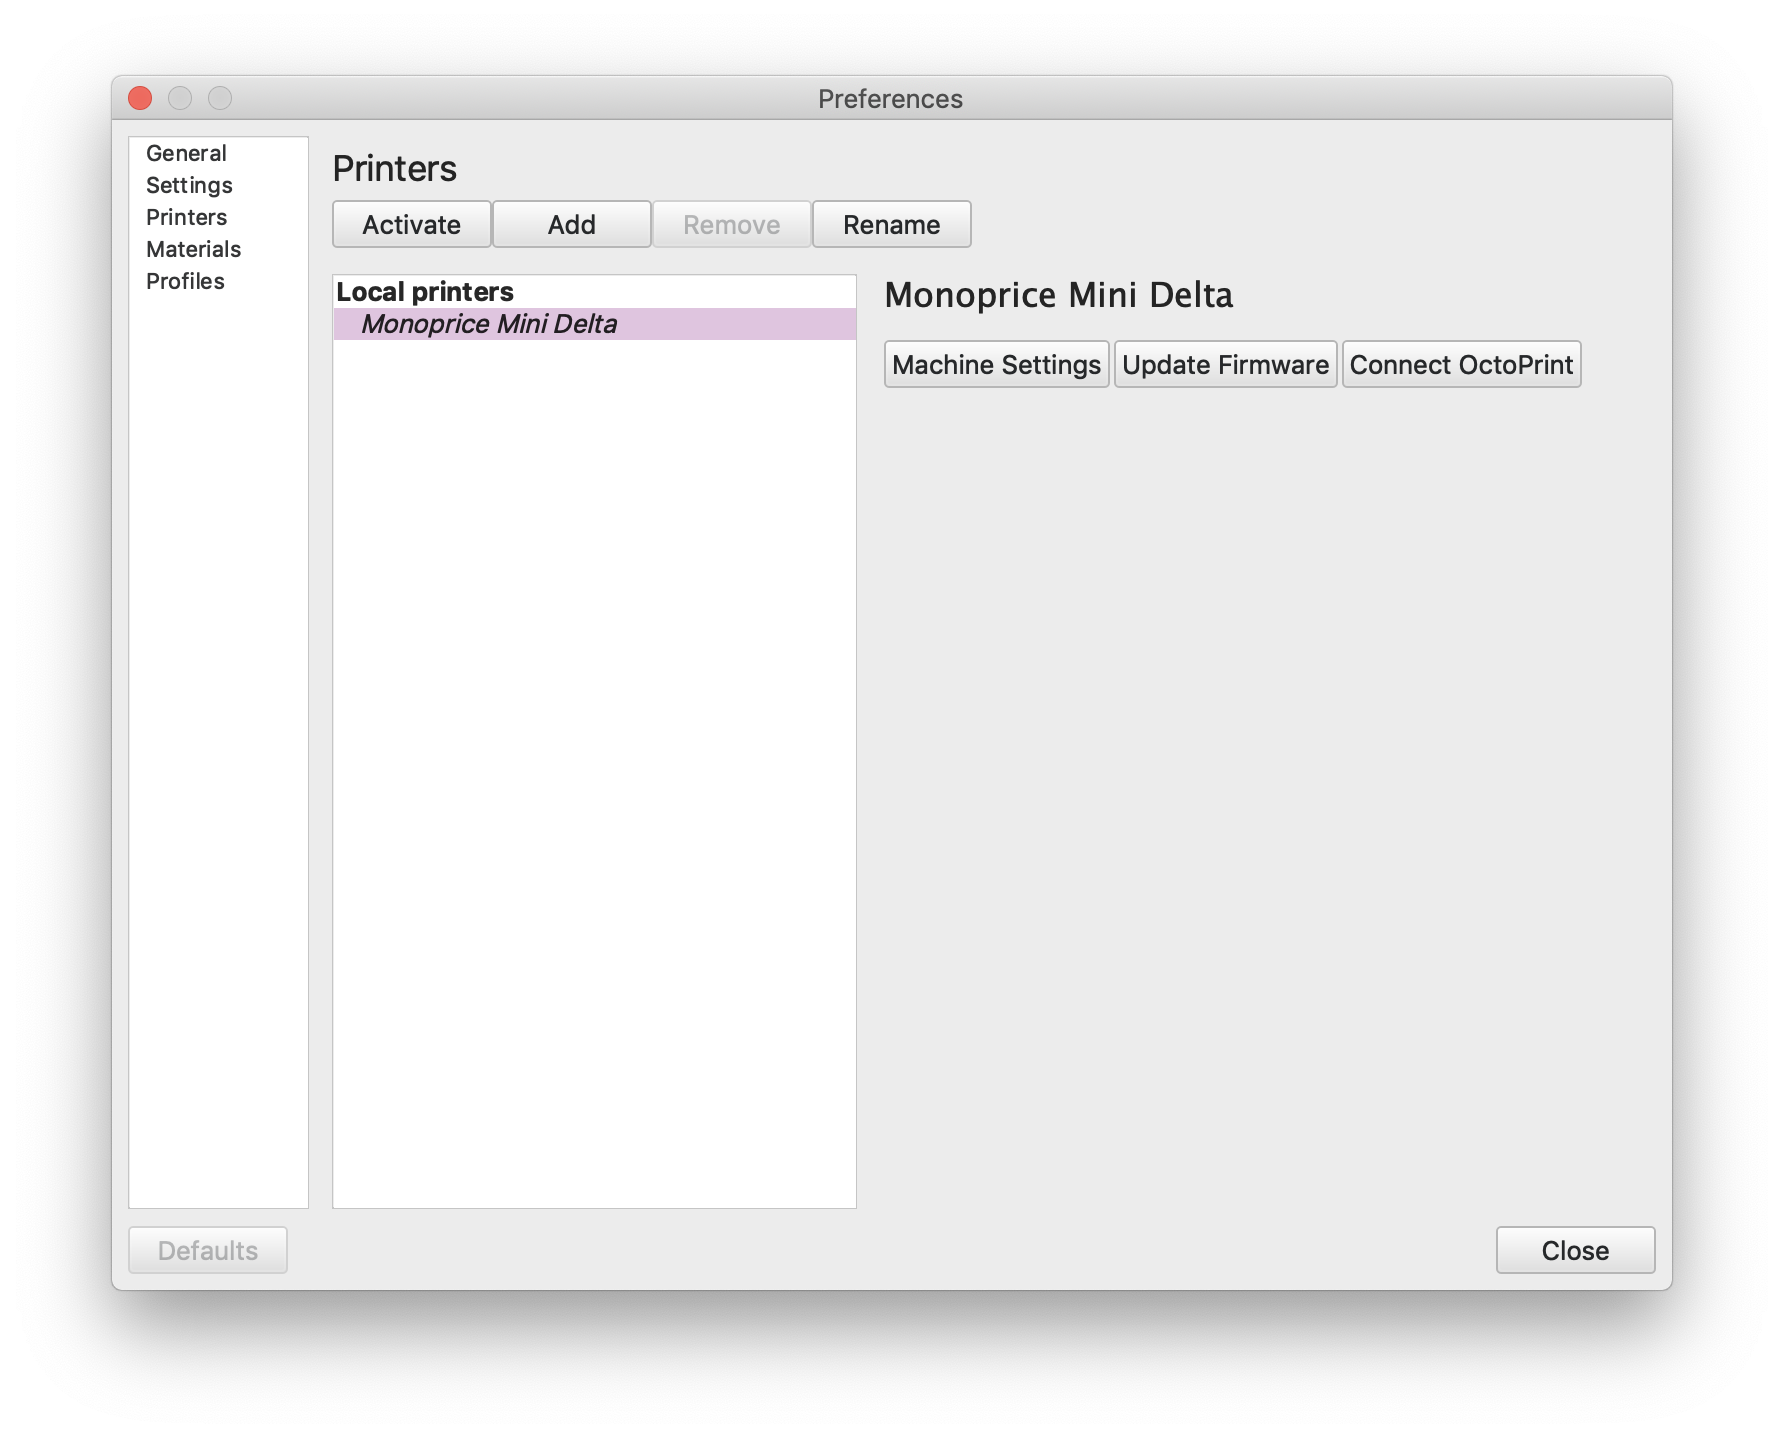
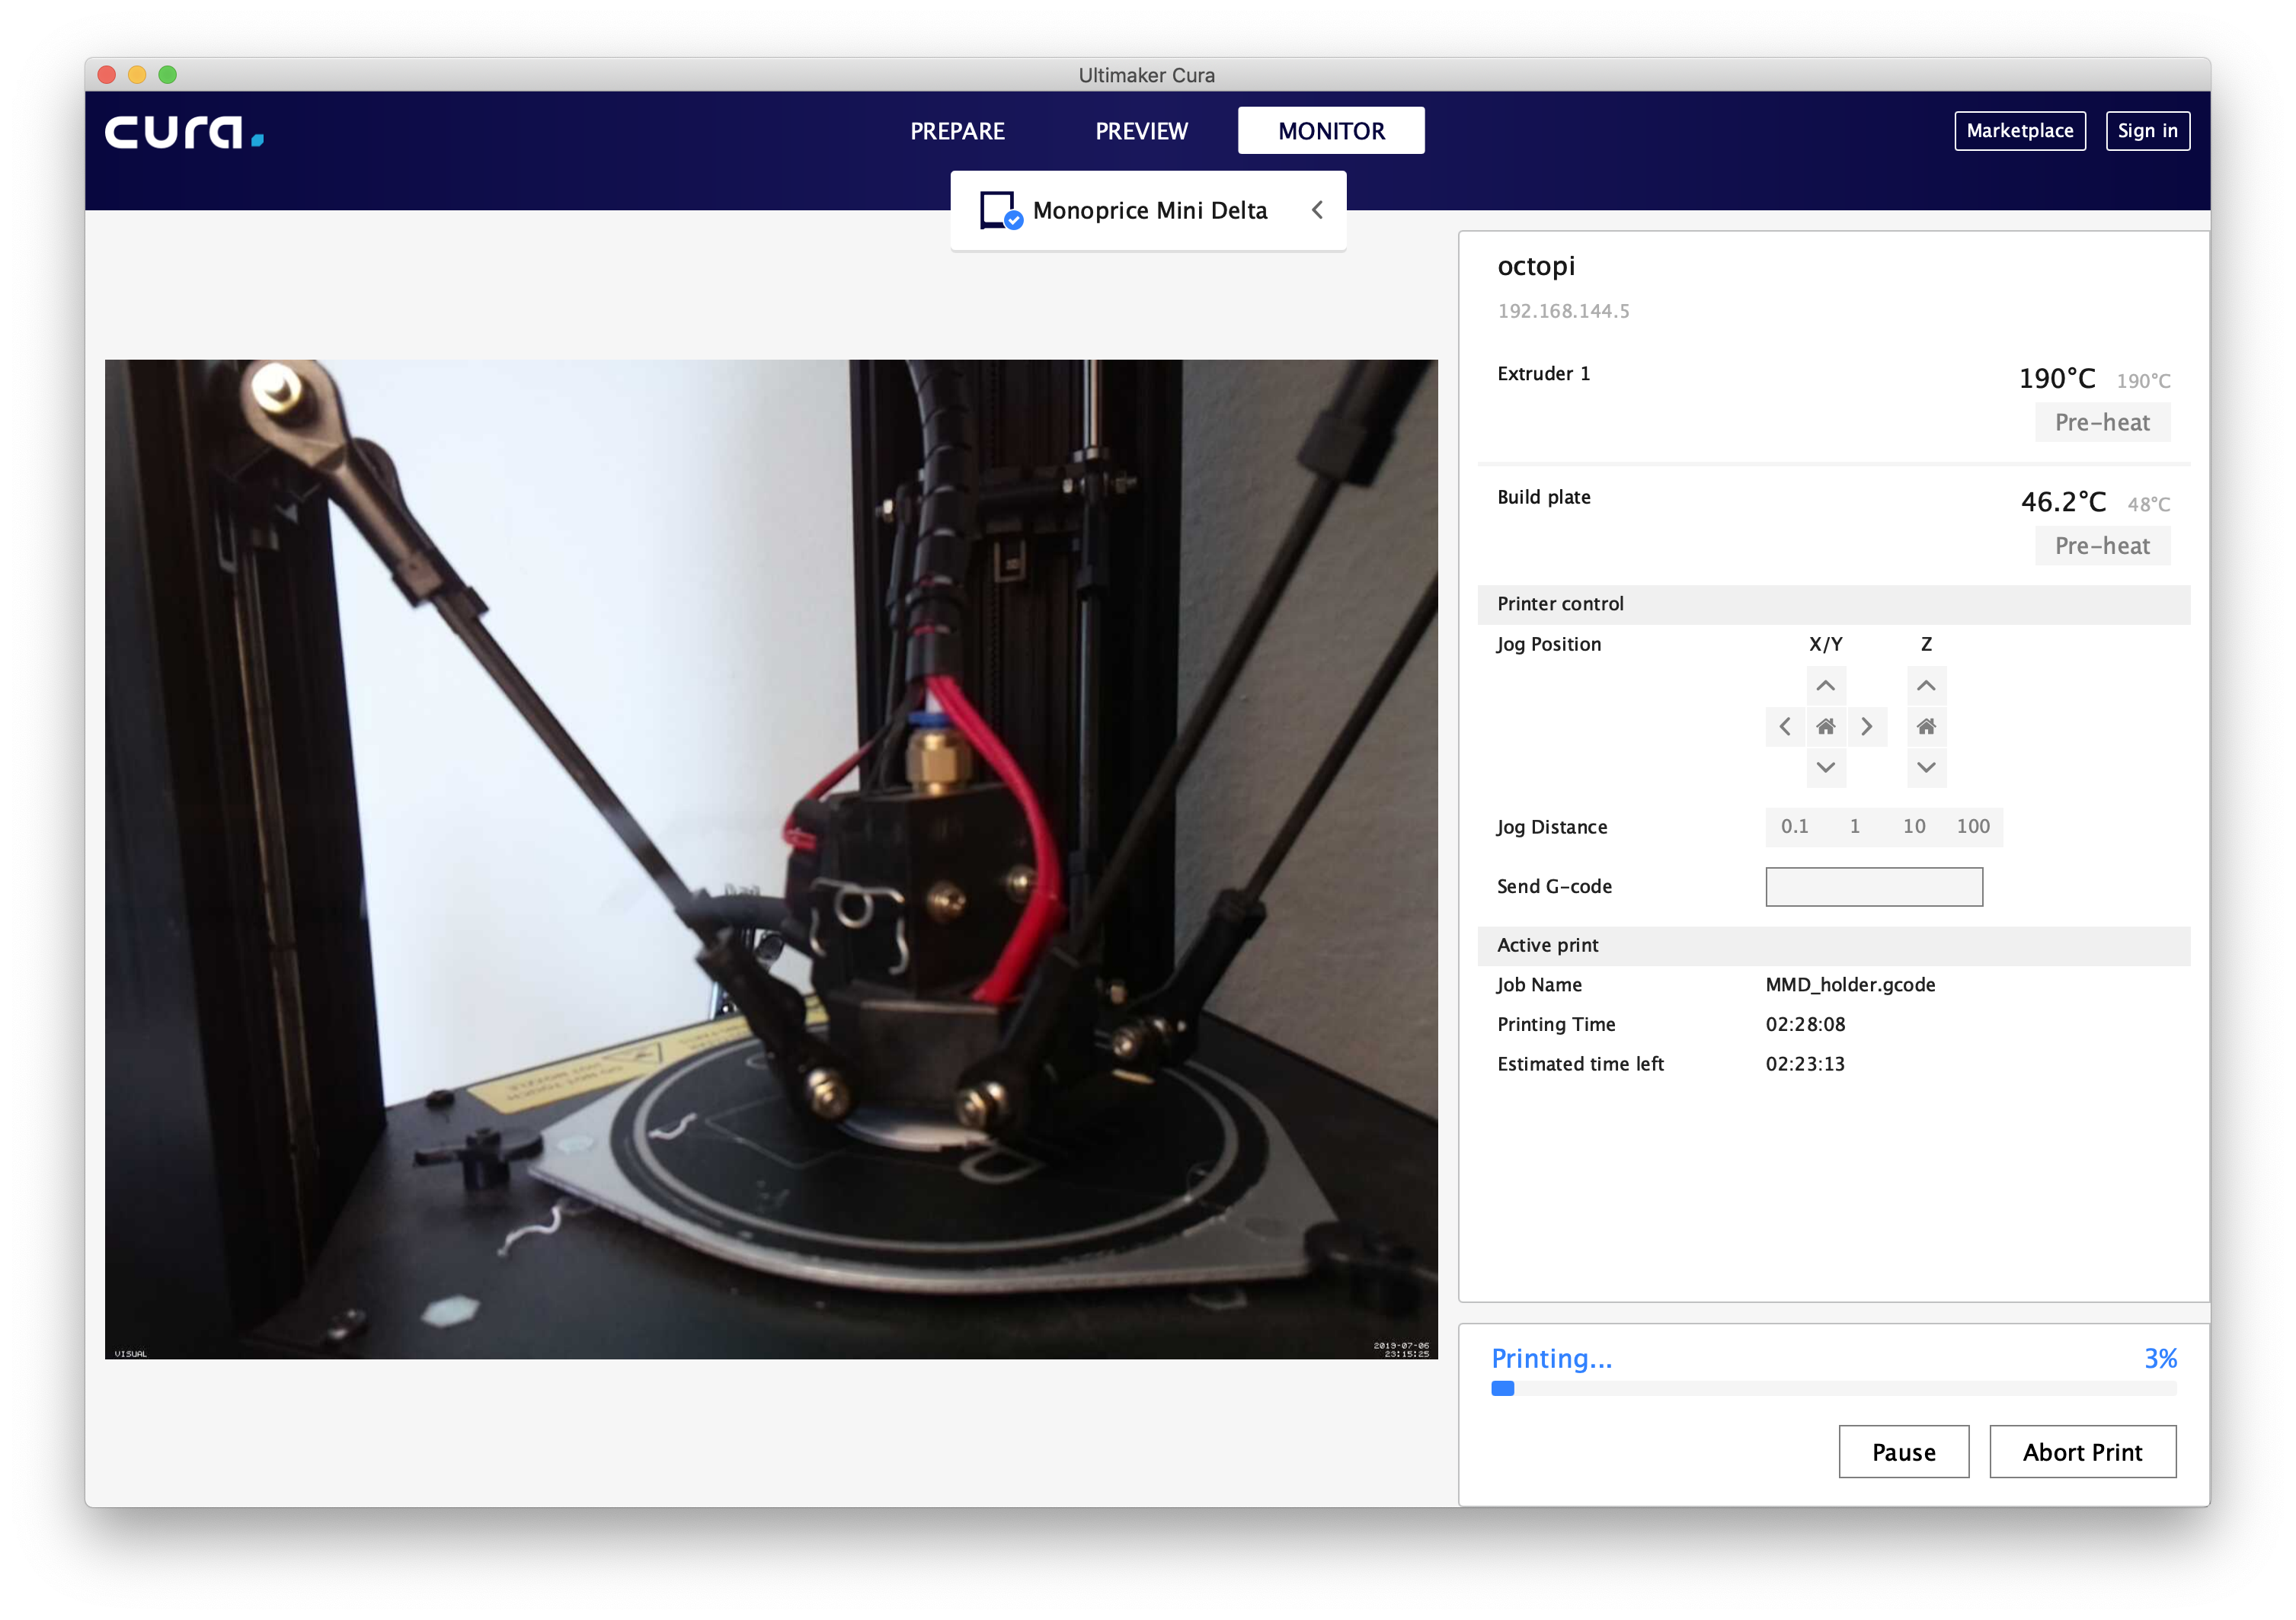
Finally, Cura assumes your printer is either directly connected or is on the network. This is only partially true for my 3D printer that’s connected to OctoPrint. While Cura doesn’t support OctoPrint out of the box, it does support user plugins. Combined with OctoPrint’s support of a REST API, someone has kindly written a Cura plugin to slice/print to OctoPrint printers. All you have to then do is add your printer as a “local printer”, and click the button to connect to OctoPrint (it will helpfully guide you through setting up an API key too).
I have some nice action shots of going through each screen in Cura in the import, slicing, preview, and printing process.
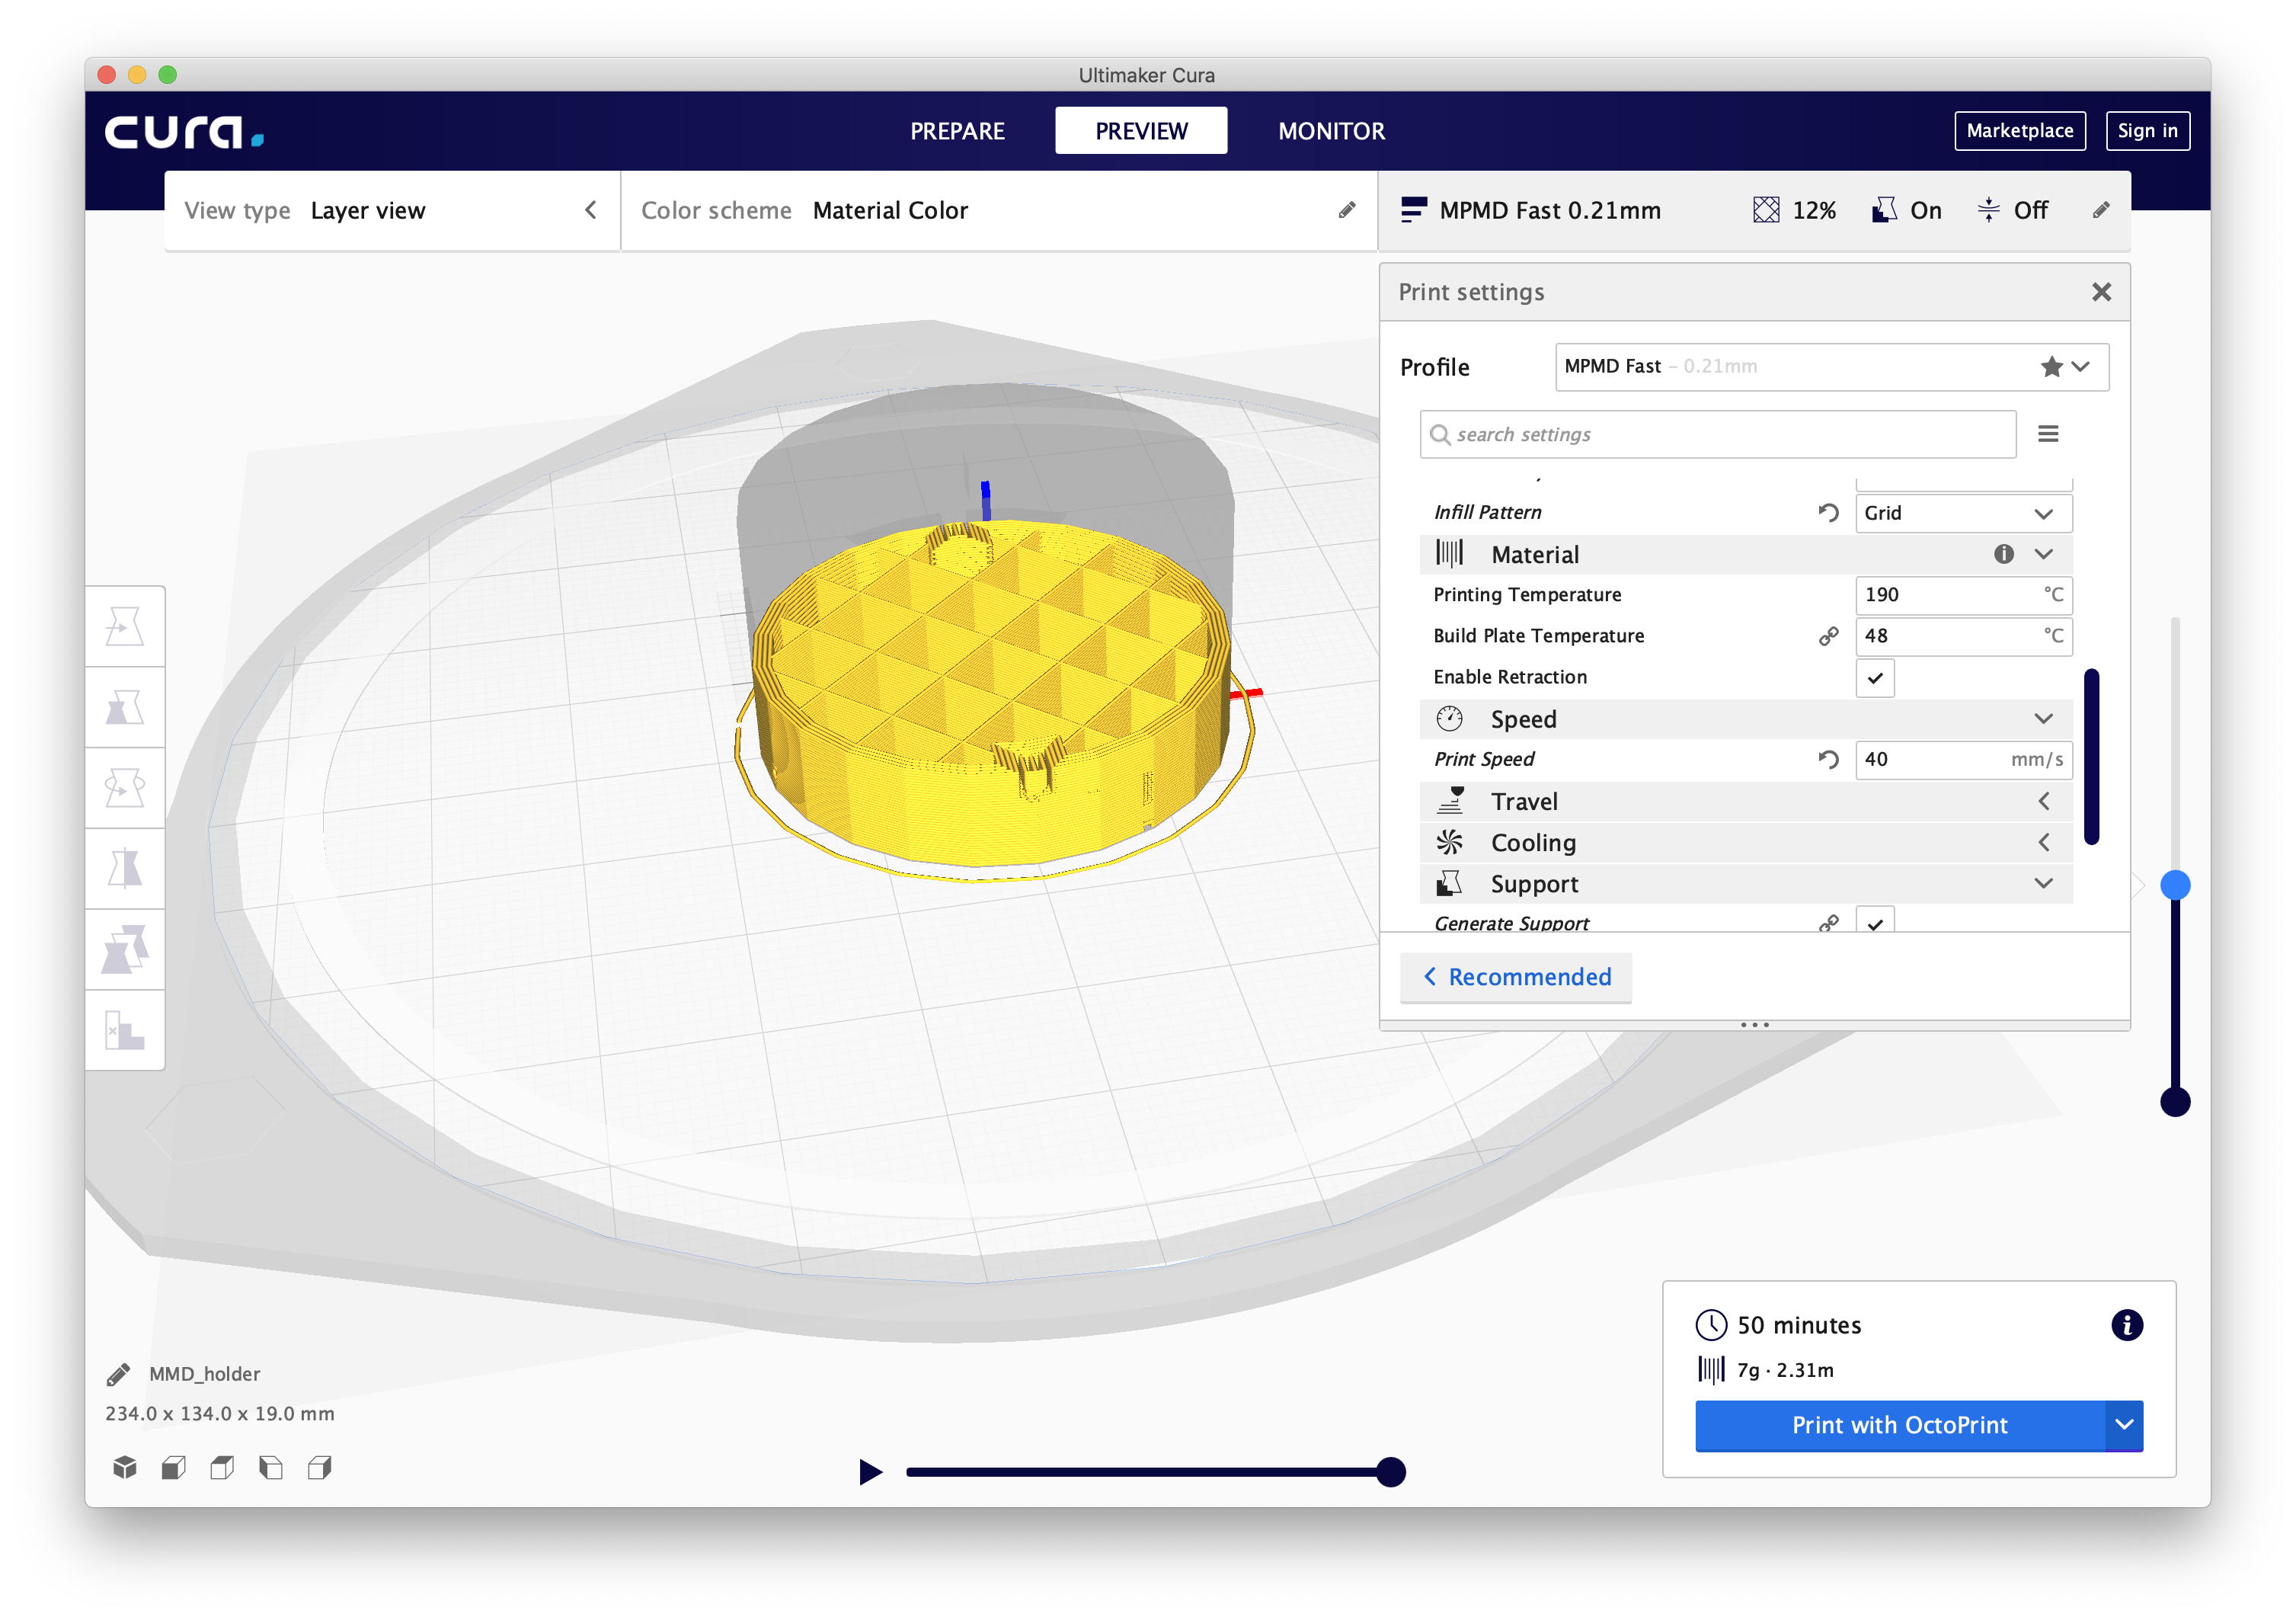
There are some other niceties offered by Cura, for instance it will highlight any problematic faces in your model by coloring them red.
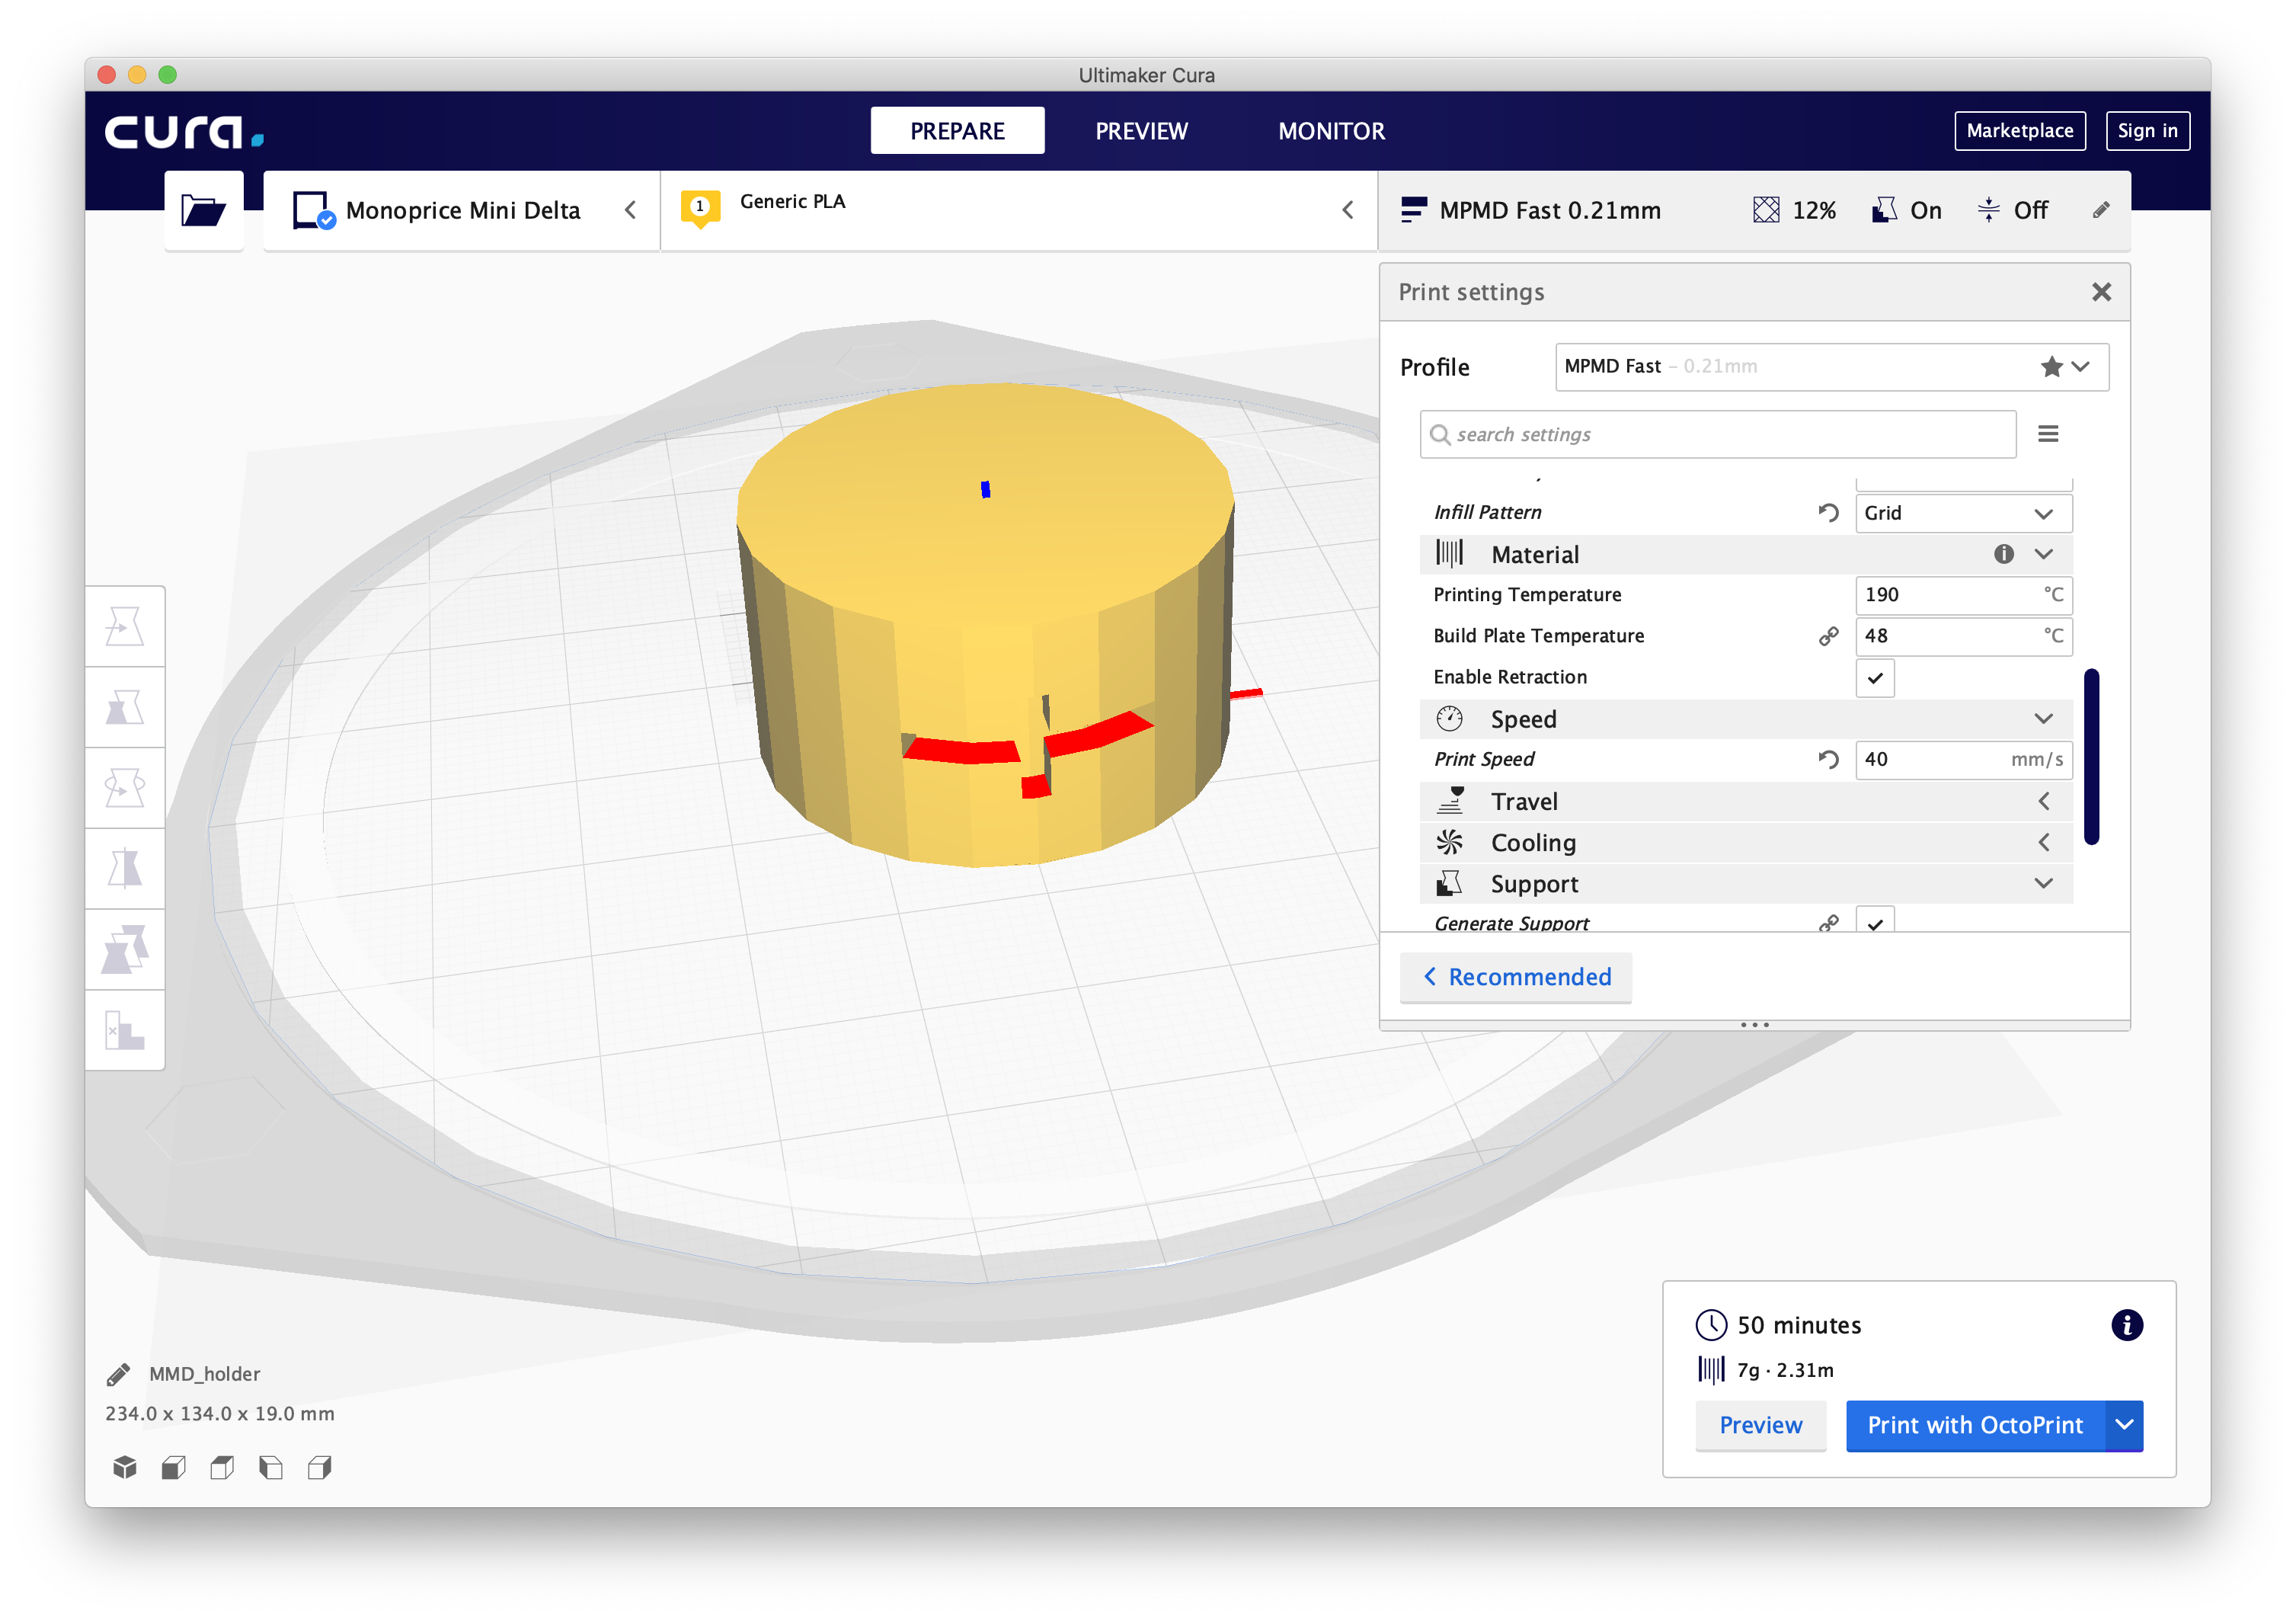
In SketchUp, the usual reason for this is that the face is accidently inverted. All outside/visible faces should be by default colored white, whereas, inside faces should be by default colored blue. In the example below, you can already predict that this model will have problems with slicing.
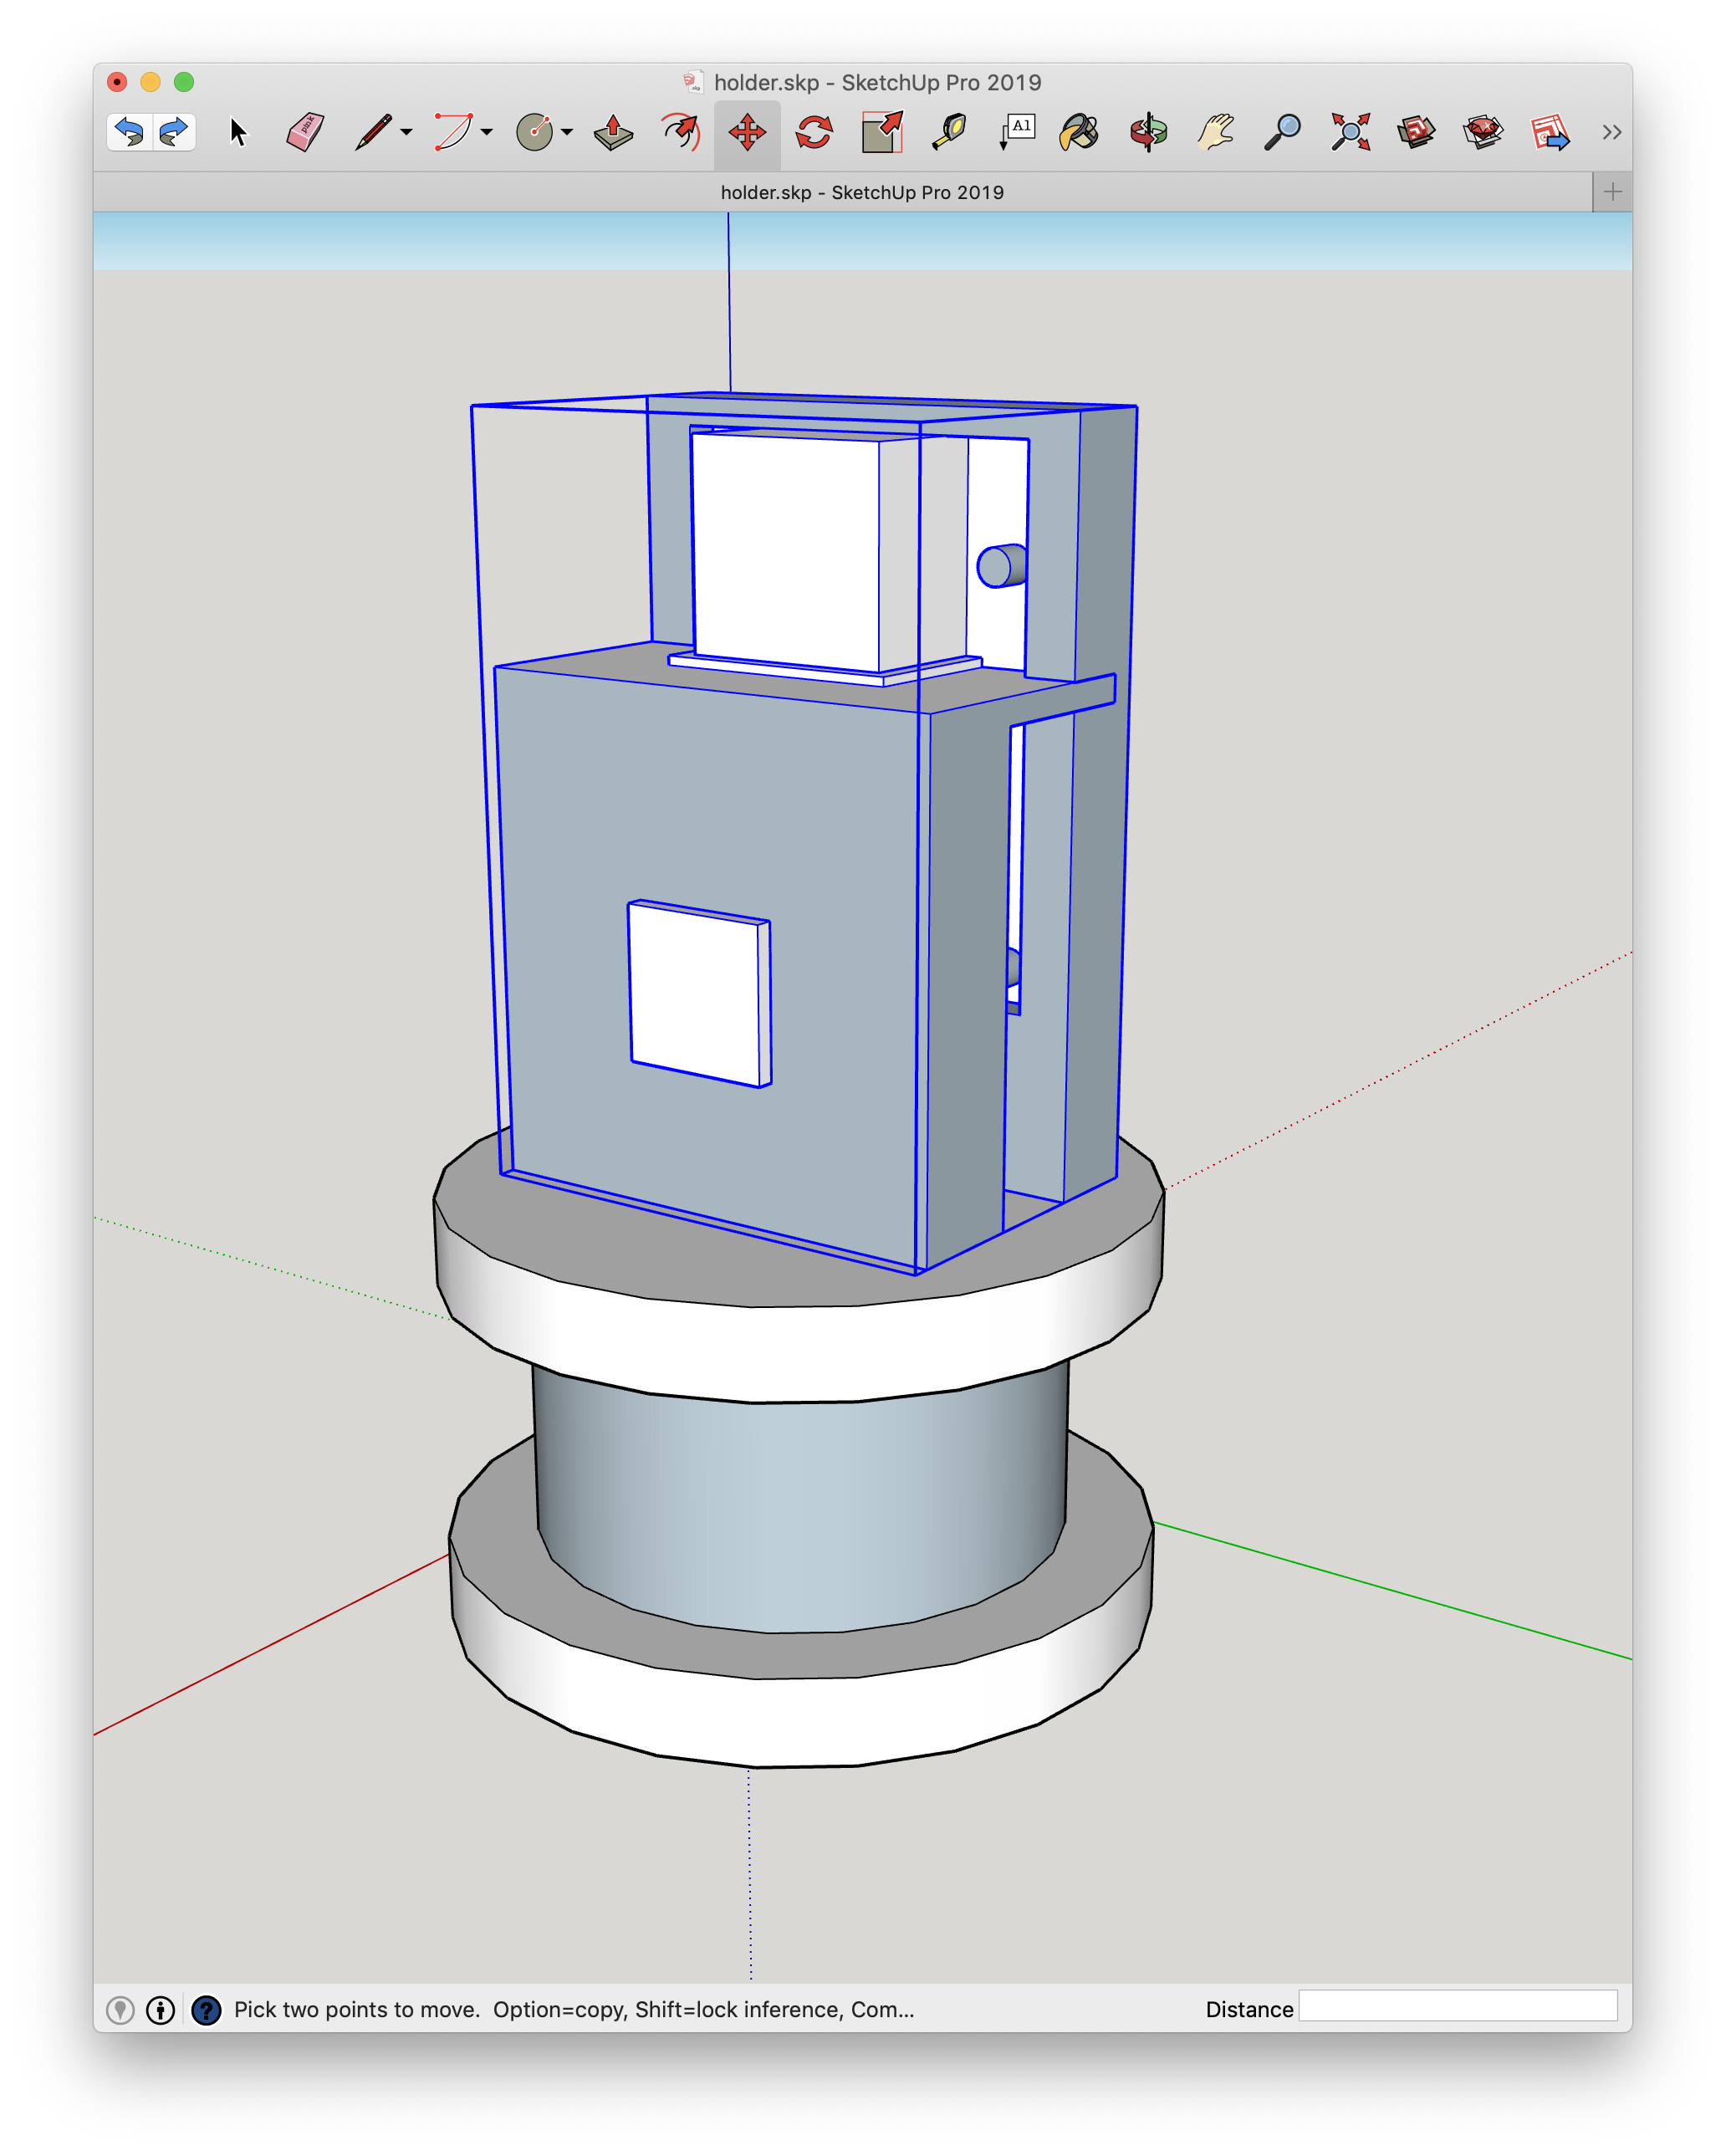
You can also view any possible accident clipping issues by using X-Ray mode in SketchUp:
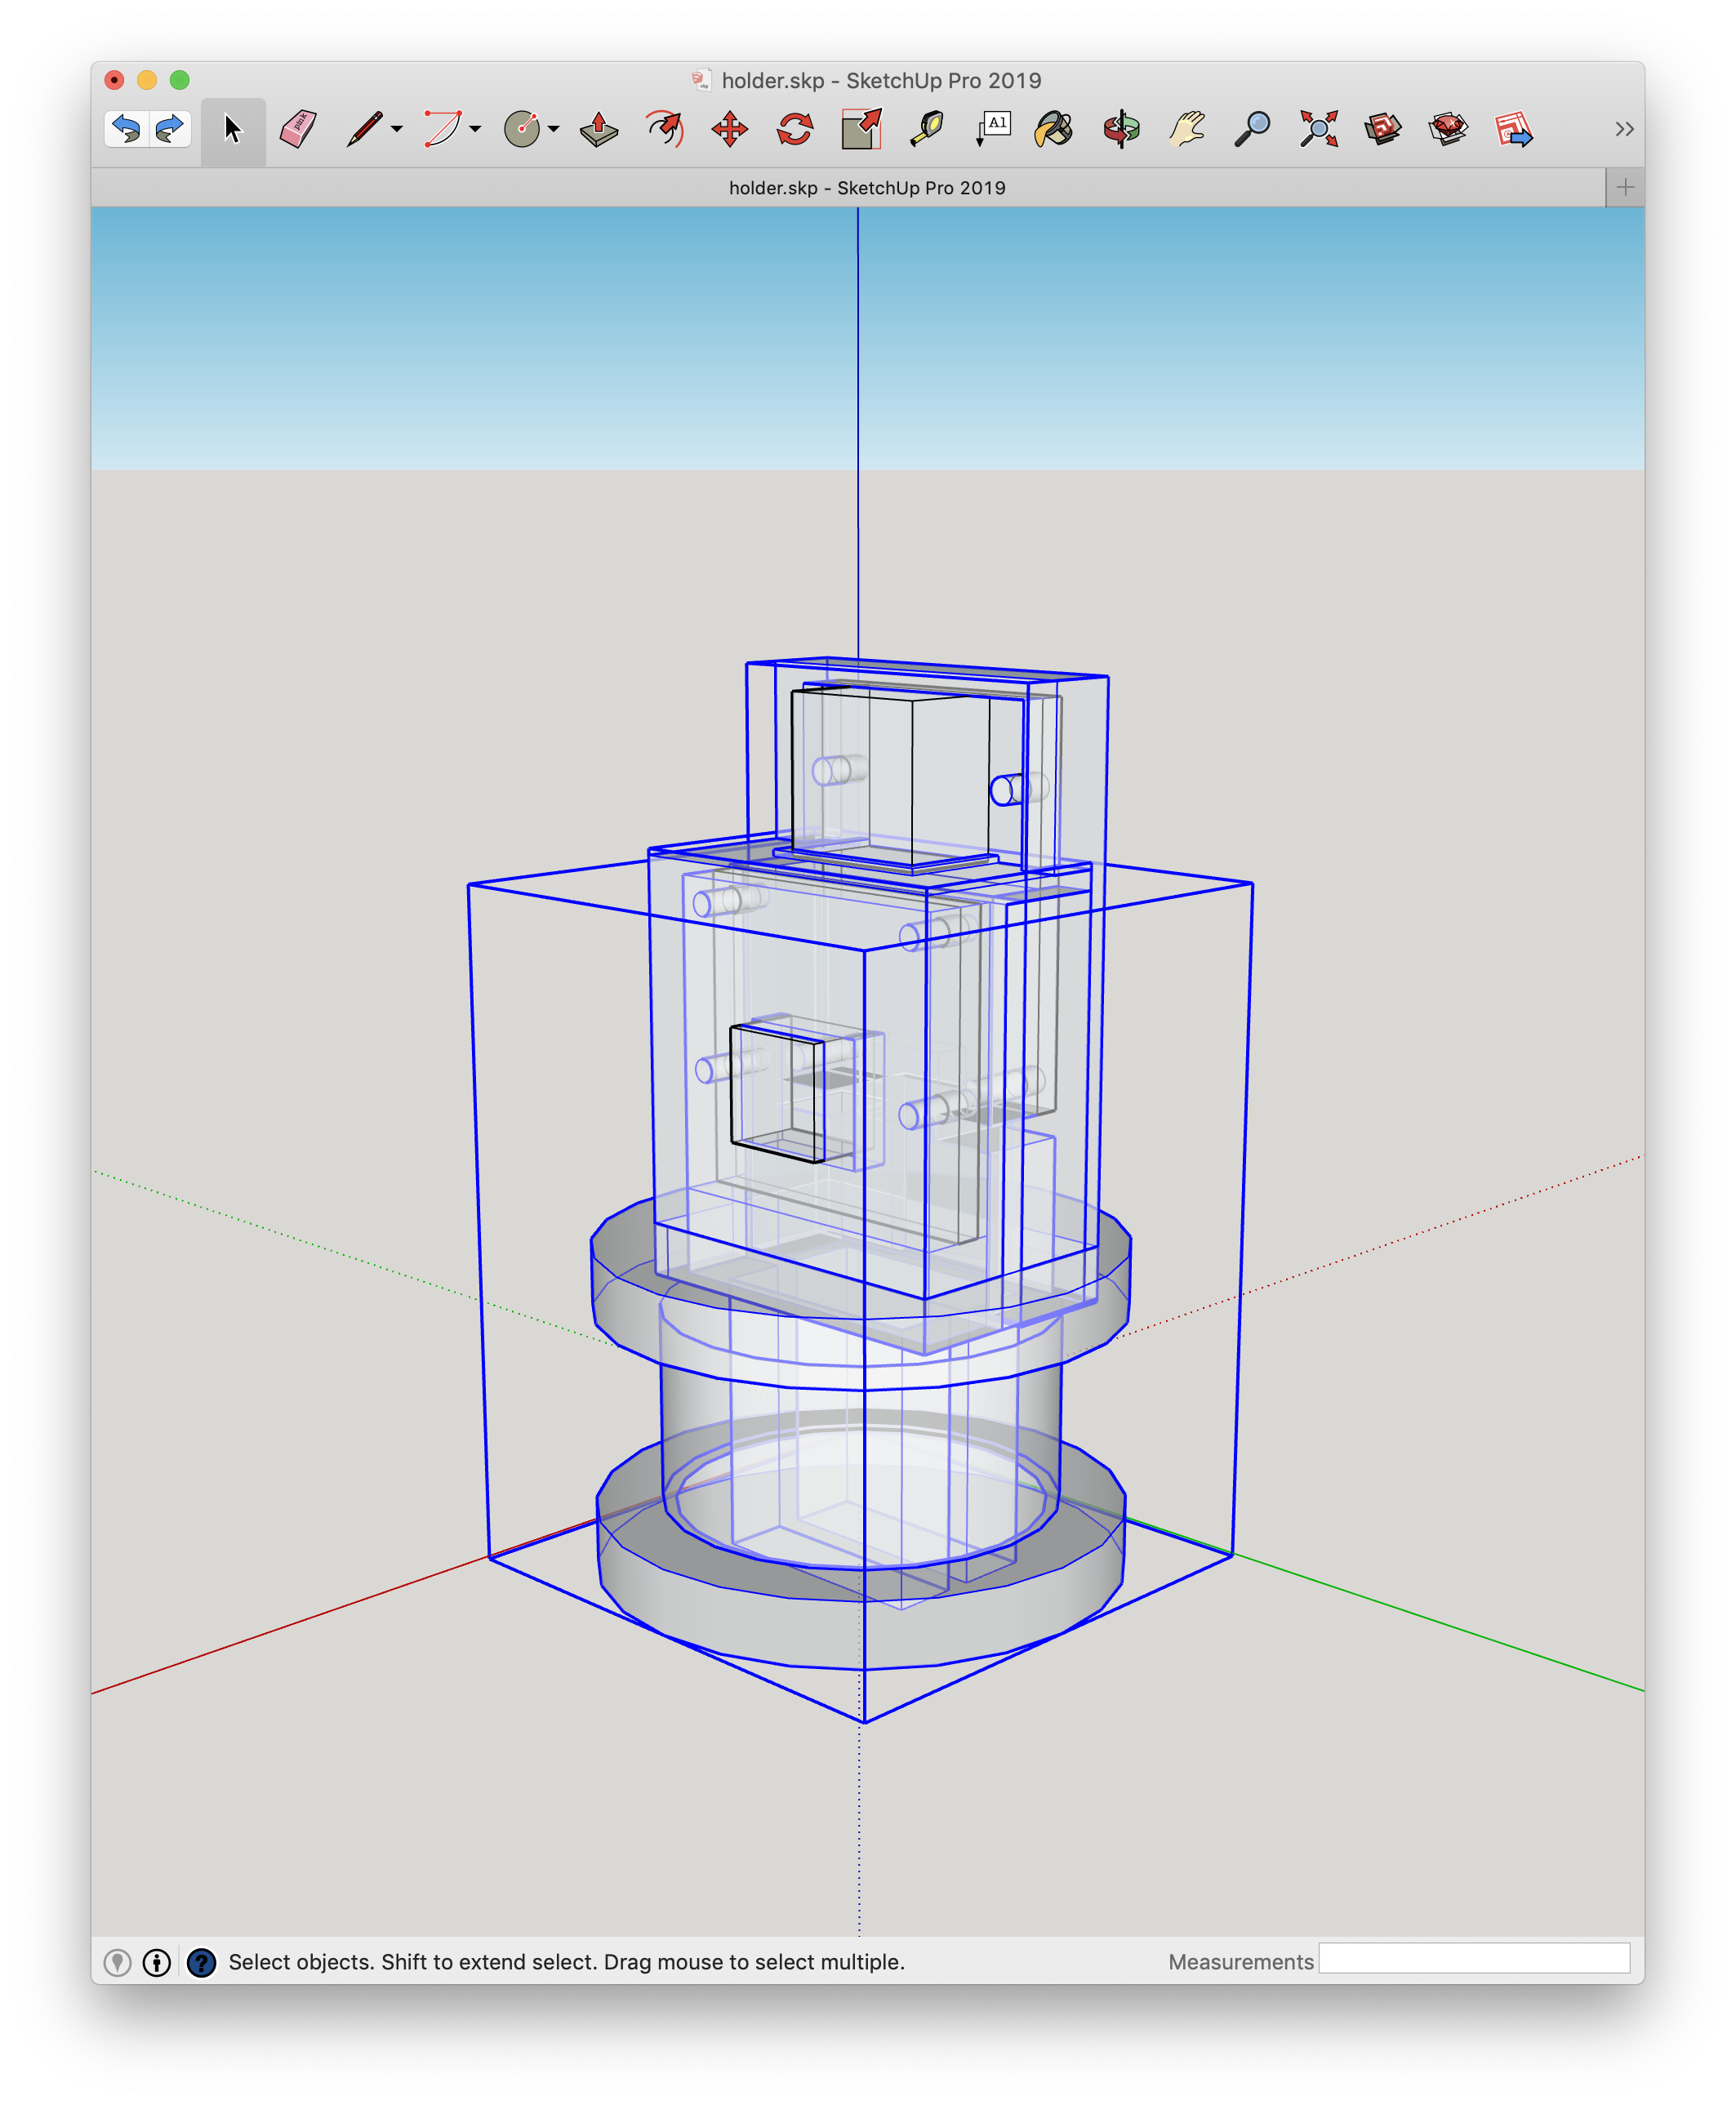
That’s all I have for now. As you can tell, I’m in the midst of printing a custom housing that will eventually hold some cameras to do timelapses of prints.
Stay tuned for further progress!